

how to draw anime boy body
This footstep past step tutorial explains how to describe an anime boy with a detailed breakdown of the proportions of the body and full general tips on achieving an anime look.
The boy in this tutorial can be anywhere from 10-15 years old. Depending on the artists manner sometimes older anime characters can be fatigued to still look fairly young. Mostly the more stylized the characters the younger they tend to look (Chibi for example).
Please go along in mind that the proportions below are just suggestions and can vary depending on grapheme and style.
If you are going to exist following along with pencil and paper be sure to draw light lines for the initial steps of the drawing as you lot will need to exercise some erasing later.
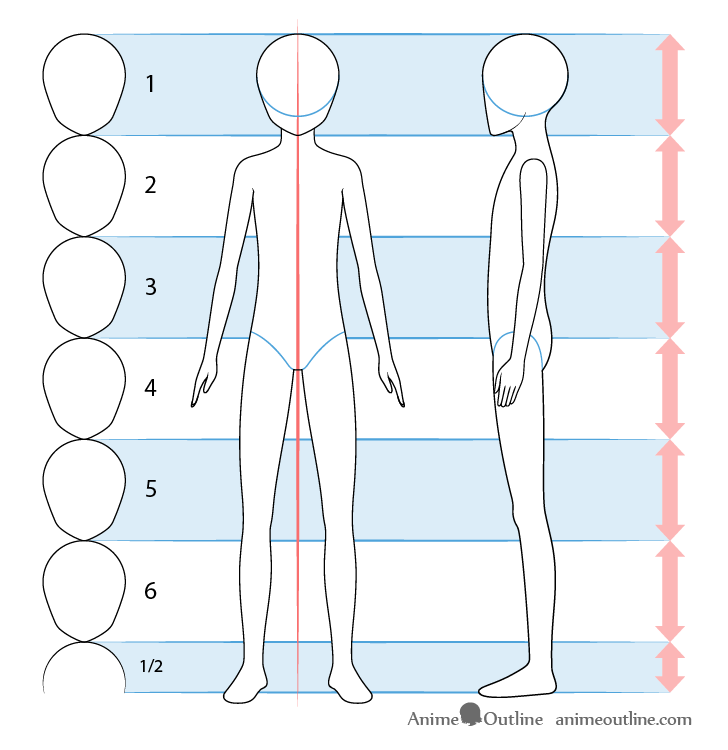
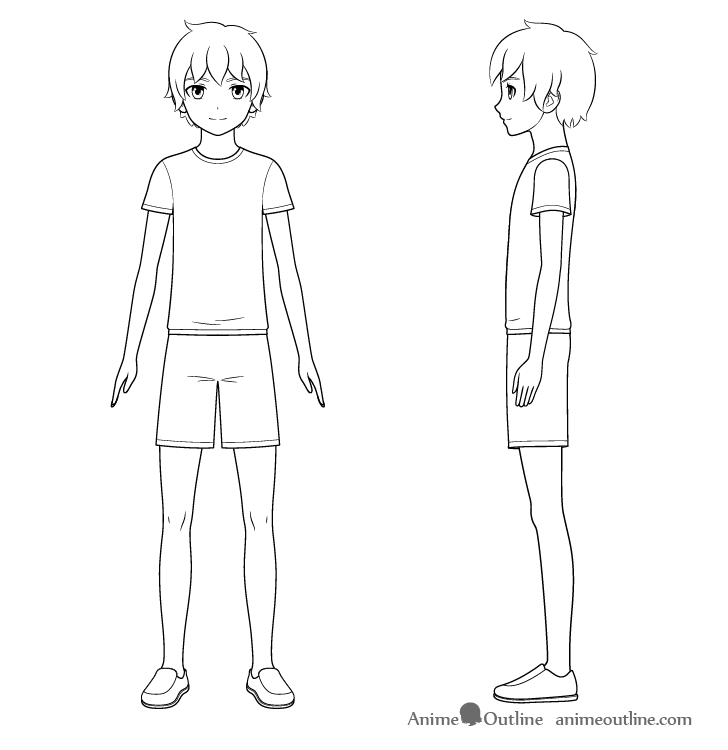
Step 1 – Anime Boy's Trunk Proportions Breakup
To brand a grapheme look younger you volition usually want to draw them more slender than their older counterpart. Muscular characters volition automatically tend to wait older.
A skillful way to measure the body is by using the head.
Anime characters tend to have bigger heads compared to their bodies than real people (younger characters especially). For this tutorial the boy volition be six and a half heads tall.
The other proportions are as follows:
Body & Caput Proportions
The height of the caput and the "above the legs" area of the body are nearly half the height of the entire trunk.
Arm Proportions
The part where the hand is attached to the arm will become down to about the horizontal halfway point of the body. Delight also keep in mind that the arms in this example are held out slightly to the sides and then these joins volition be a niggling lower down if the arms area held correct up against the body.
The area from the hand joint to the elbow and the elbow to the shoulder is about the same length.
Leg Proportions
The legs are most half the length of the entire body.
the length of the legs from the lesser of the foot to below the knee is roughly the same as the length from the lesser of the knee to the horizontal halfway signal of the body.
Please note that in the side view the "front" leg is drawn larger due to perspective than the back leg.
For more on perspective drawing you can see:
Perspective Cartoon Tutorial for Beginners and How it Relates to Anime
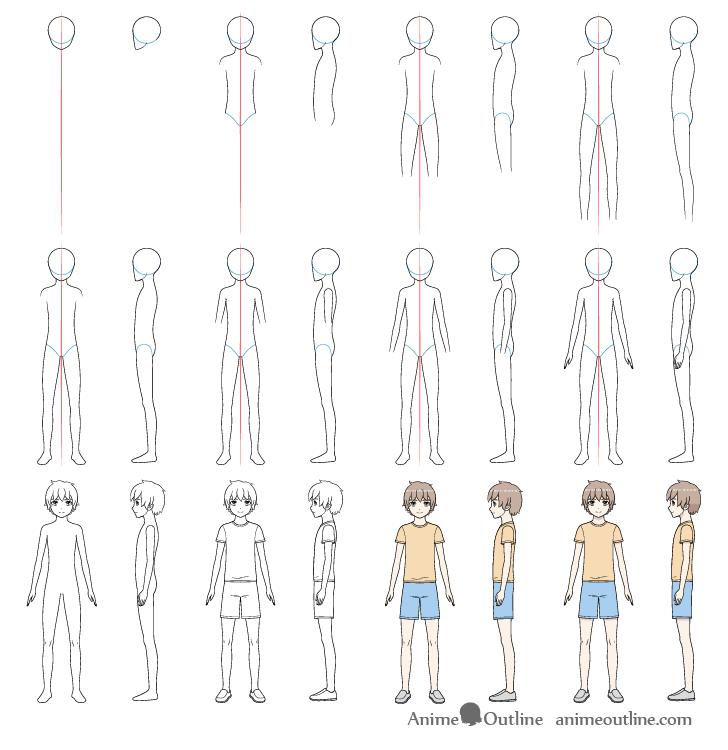
Stride ii – Drawing the Body
Star the drawing from the caput and work your way down.
Offset with a light line cartoon of the entire shape of the body without any of the smaller details.
For drawing the head and hands you lot can see:
- viii Step Anime Boy'southward Head & Face Drawing Tutorial
- How to Draw Anime and Manga Hands Footstep by Step
Drawing the Front View
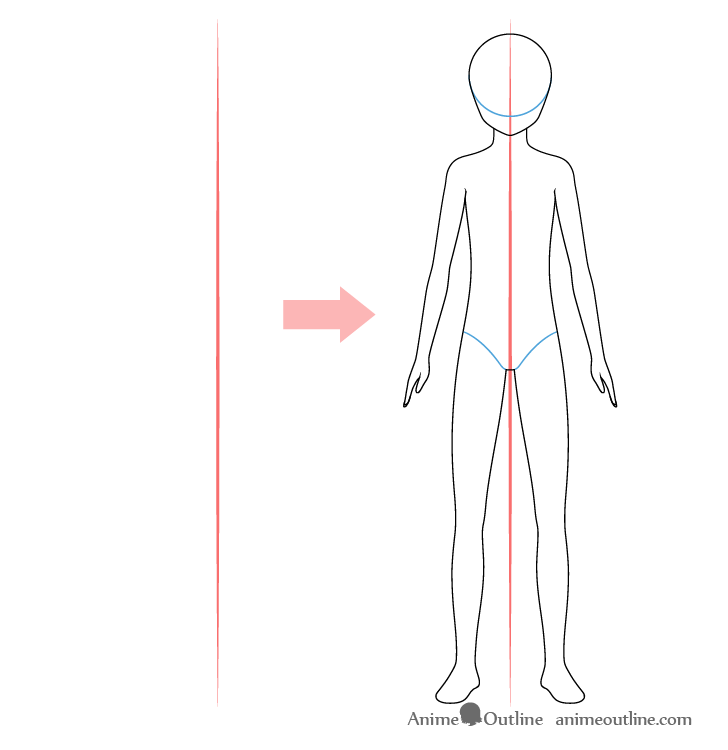
The main challenge of drawing the trunk in the forepart view (other than having the right proportions) is having both sides be symmetrical.
To assistance yous can start your drawing by first making a vertical line through what volition after be the eye of the trunk. This will assist yous in making sure both halves of the body are even in width.
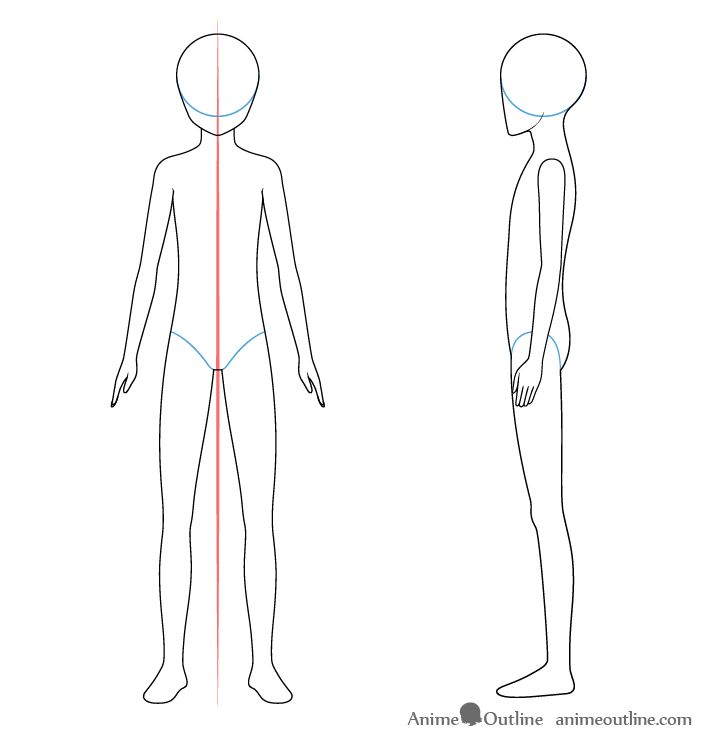
Drawing the Side View
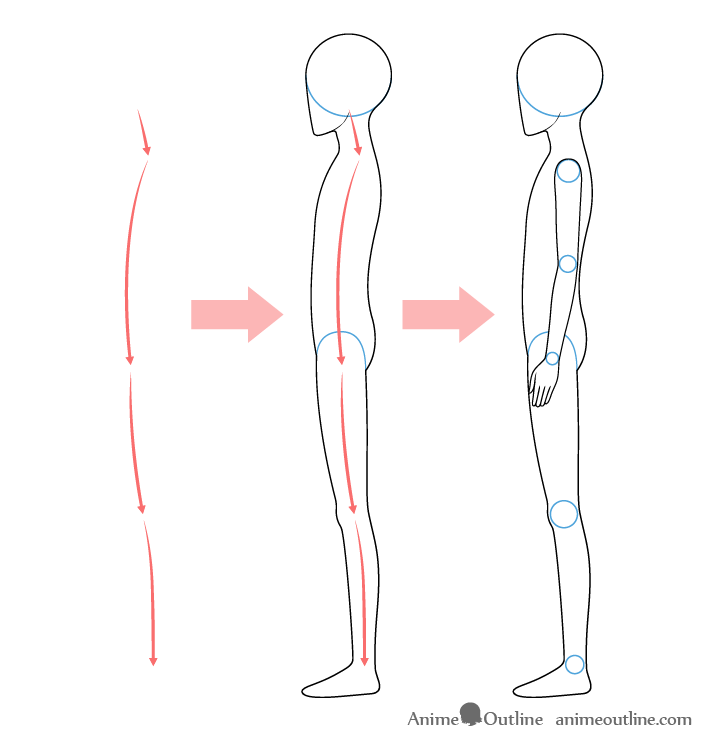
The side view of the body can actually be more challenging to describe than the forepart view.
In the side view various parts of the body curve in slightly different directions as indicated in the above example.
Drawing Different Views
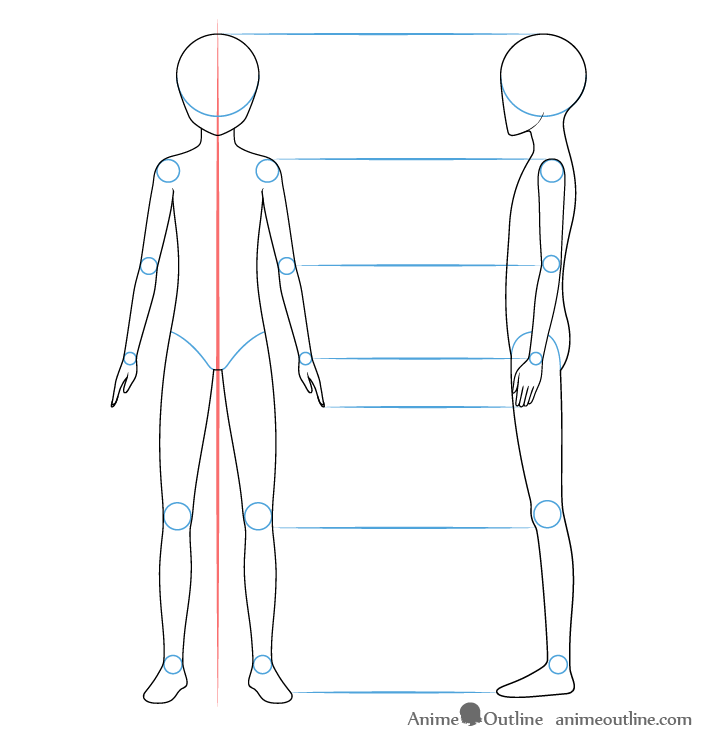
If you desire to draw the trunk from different views but in the same position then you can projection a gear up of lines from one view to the other. This will assist you make sure that the proportions of the body in both views are roughly the same.
Once you cease drawing the shape of the body yous tin erase any construction lines.
Step 3 – Drawing the Face
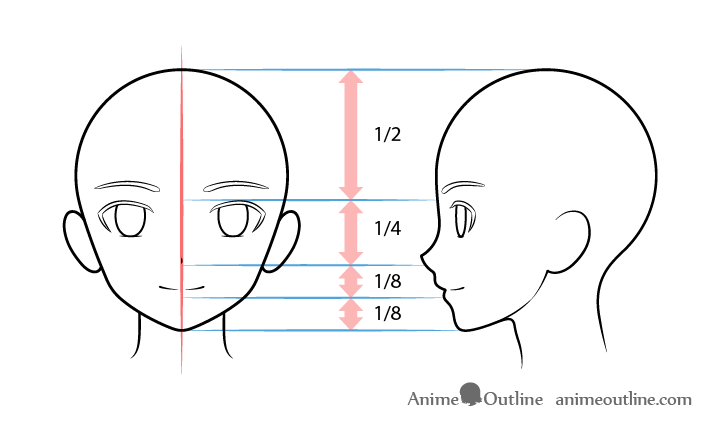
Draw the facial features before you draw the pilus (including the parts that will be covered by pilus).
The reason yous want to practise this is to avoid mistakes. For a more detailed explanation on why you lot desire to draw this fashion you can see:
Beginner Guide to Cartoon Anime & Manga
For a detailed step past pace guide to cartoon an anime male child'southward face you can once more see:
eight Step Anime Male child's Head & Face Drawing Tutorial
Stride 4 – Cartoon the Pilus
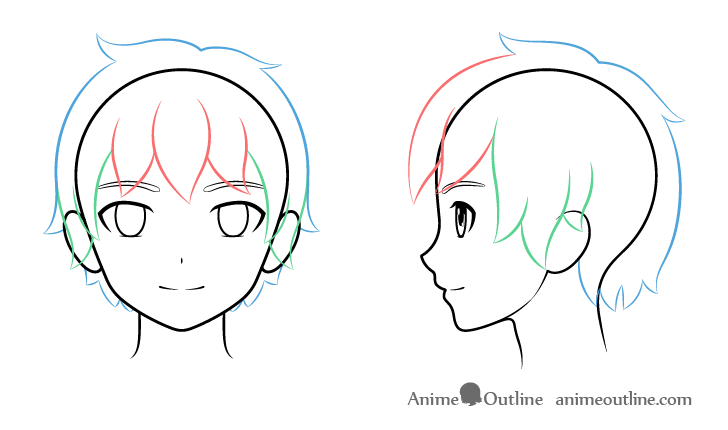
For this particular hairstyle depict the to role of the hair post-obit the shape of the top of the caput merely some altitude away as pilus has volume.
Describe the ends of the hair branching out into clumps of diverse sizes that curve in slightly different directions.
For more on drawing hair yous tin see:
How to Depict Anime & Manga Male & Female Hair
Step 5 – Drawing the Dress
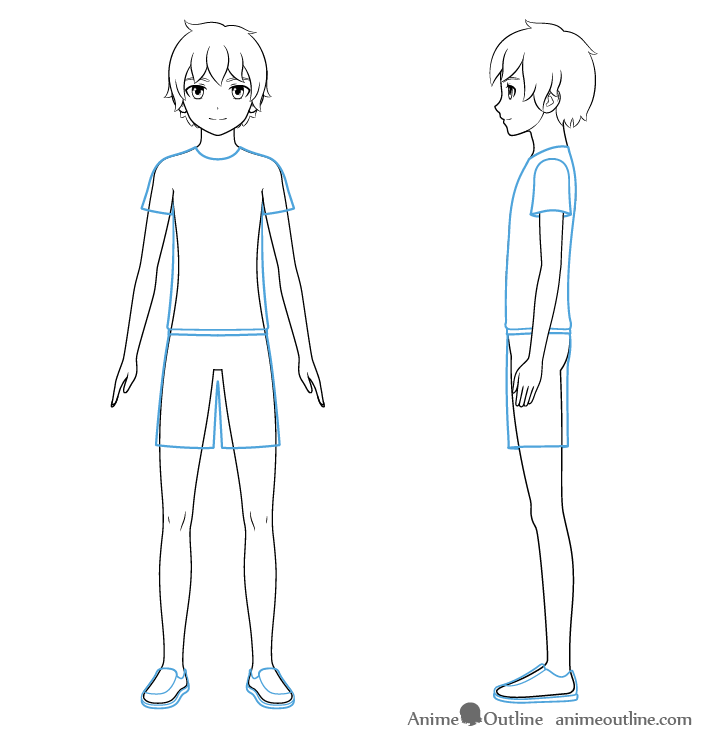
In this instance we will describe the boy wearing a t-shirt, shorts and shoes.
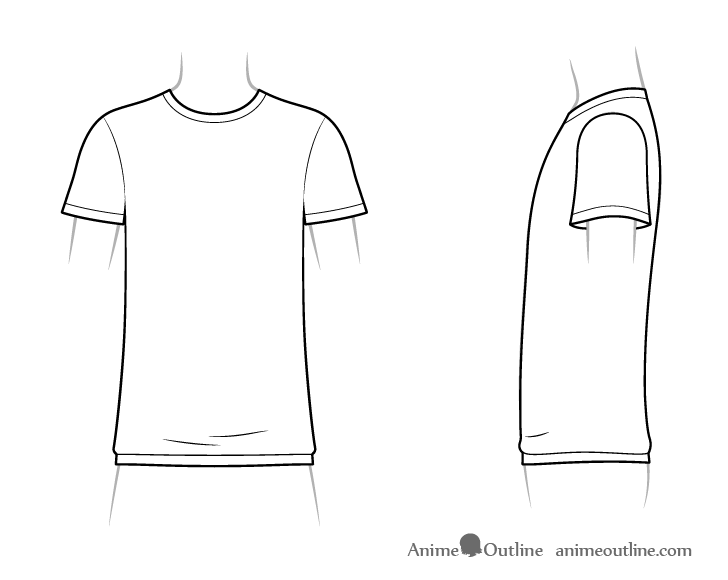
Drawing the T-shirt
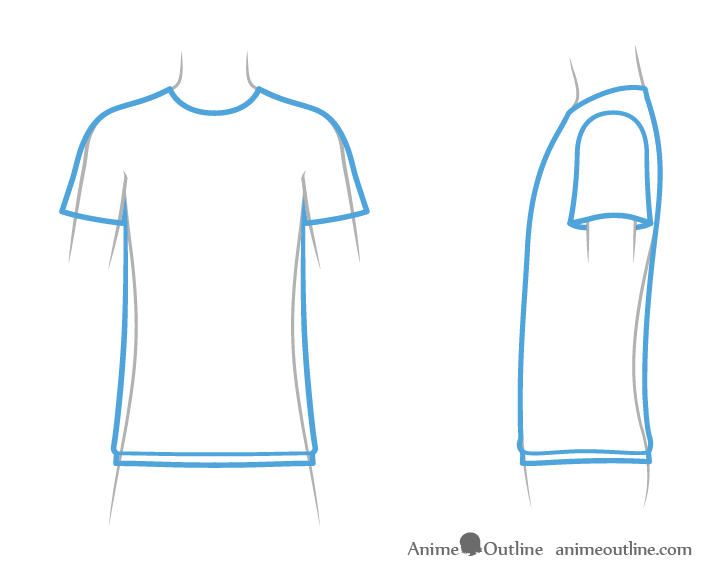
For the top function of the t-shirt draw it pretty much hugging the shape of the shoulders. Make the sleeves "fan out" towards the ends. Equally the shirt is not very tight leave some space between the torso and the shirt equally it volition hang from the wider chest area.
Draw the shirt a footling wider towards the very bottom as that area will have some folds.
Drawing the Shorts
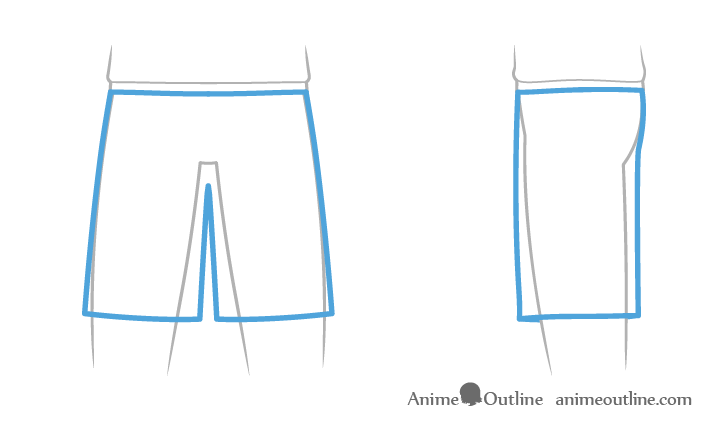
Draw the shorts starting from the bottom of the shirt (pretty much touching the legs) and and so fanning out slightly as they go down.
For more on drawing anime dress see:
How to Draw Anime & Manga Clothes
Drawing the Shoes
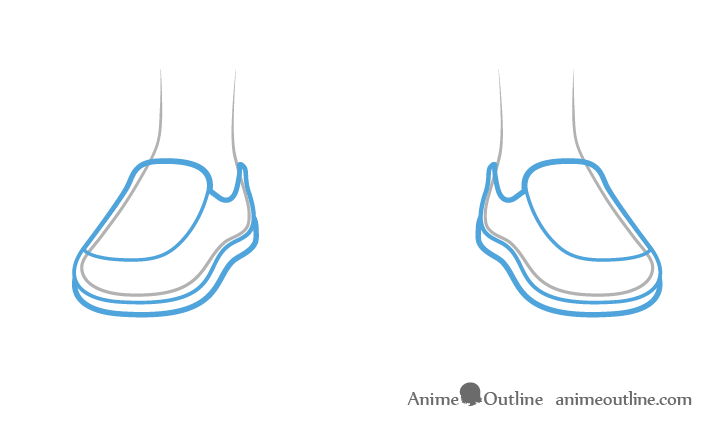
You can draw the shape of the shoes roughly tracing the shape of the feet but with some distance to account for the thickness of the fabric the shoes are made from.
Step 6 – Drawing the Details
Center Details
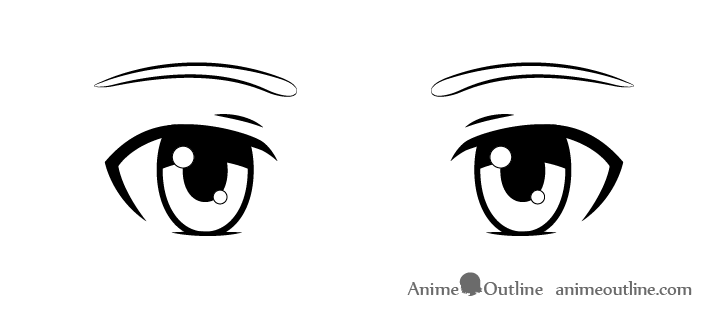
Draw the inner details of the eyes such every bit the pupils and reflections.
You lot tin can also depict a hint of the eyelids slightly above the optics.
For some detailed tutorials on cartoon the eyes you can see:
- How to Draw Male Anime & Manga Eyes
- How to Draw Anime Eyes and Centre Expressions
Shirt Details & Folds
You tin can add together a few lines at the bottom of the t-shirt to bear witness the folds.
Y'all can also describe some thinner lines towards the ends of the sleeves as at that place will usually be some stitches there.
Shorts Details & Folds
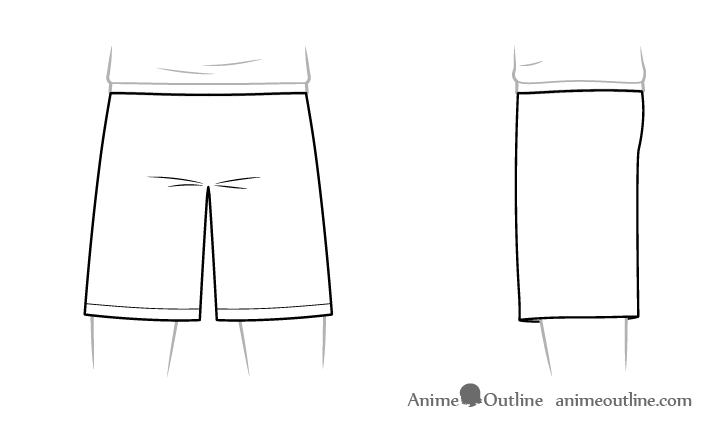
For the shorts you tin can add some folds to the centre are where there is unremarkably tension created past the two legs pulling the shorts in different directions.
You can again add a pair of lines at the bottom for a little more detail.
Knees
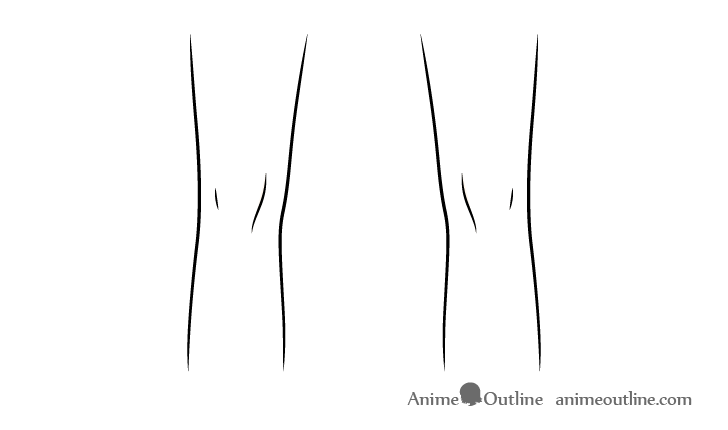
Draw just a hint of the knees in the forepart view.
Shoe Details
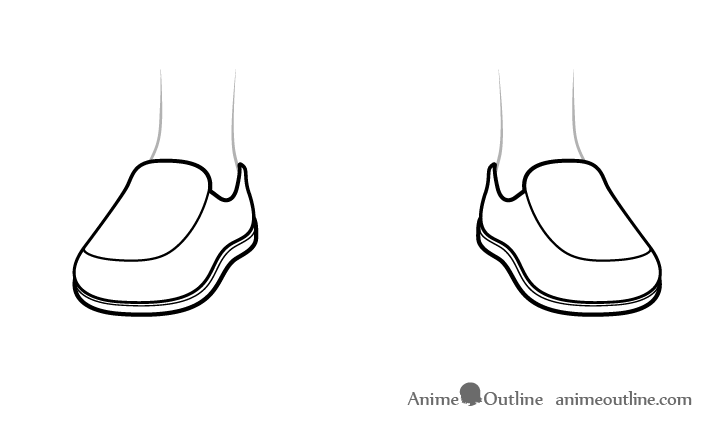
For the shoes you can just draw in the inner details of their design.
Footstep 7 – Coloring

To colour the cartoon you can merely fill in each area with the advisable color (exist certain to leave the reflections white if coloring on newspaper). Commencement with the larger areas and piece of work your way down to the smallest.
For an explanation of different colour combinations you lot can run across:
Beginner Guide to Picking Colors When Drawing Anime & Manga
For a step by step coloring tutorial yous can see:
How to Color an Anime Graphic symbol Footstep past Stride
Step viii – Shading & Finishing the Drawing
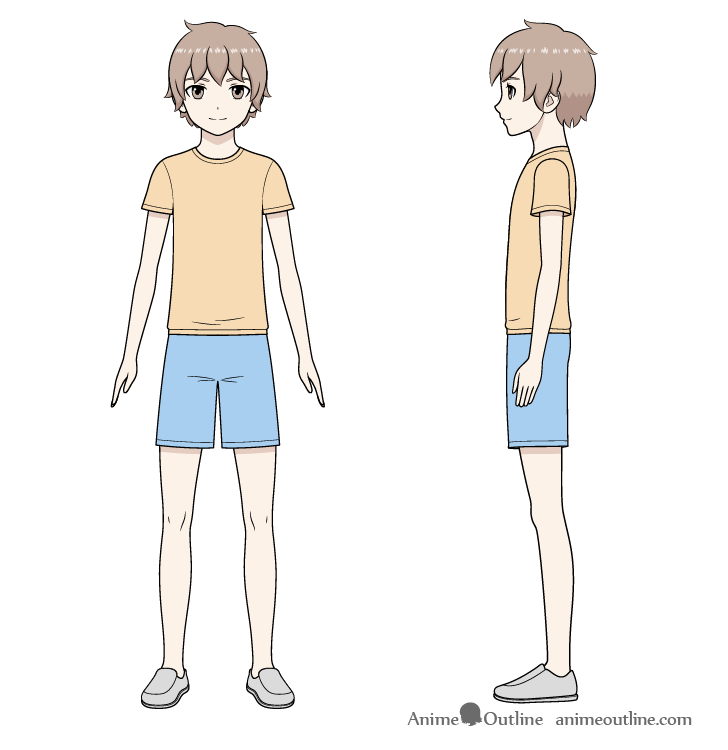
For some basic anime style shading you tin can add together shadows in the ordinarily shaded areas. In most mutual lighting conditions the light is coming from in a higher place so the shadows will exist cast downwards. In this case the shadows will be on the cervix from the caput and on the artillery and legs from the sleeves of the shirt and the shorts.
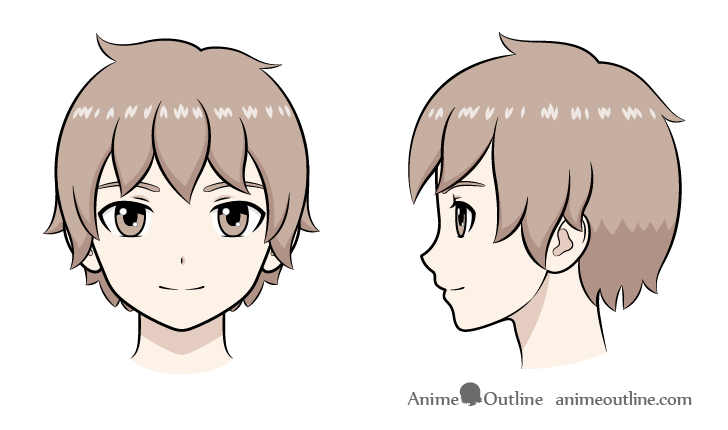
On the face there volition be some shadows as follows:
- From the hair
- Effectually the eyelid areas
- The top role of the optics (from the eyelashes)
- To one side of the nose
Conclusion
This tutorial covered a lot of information on drawing a young male anime character. Though it provides a expert basis for drawing these types of characters please remember that this is just ane instance. You lot tin can experiment for yourself to try and create a different looking grapheme.
For drawing a slightly older male grapheme y'all can run into:
How to Draw an Anime Guy Body Step By Step Tutorial
For drawing a very muscular male person body see:
How to Draw Anime Muscular Male Body Footstep past Step

Source: https://www.animeoutline.com/how-to-draw-an-anime-boy-full-body-step-by-step/
Posted by: jacksonhimmen1955.blogspot.com
0 Response to "how to draw anime boy body"
Post a Comment